Motorbikes, offering freedom and exhilaration, represent a unique transportation experience, blending practicality with a thrilling ride for enthusiasts globally.
These versatile machines cater to diverse needs, from daily commutes to adventurous explorations, embodying a lifestyle of independence and open roads.
Understanding the various types – standard, cruiser, sport, dual-sport, touring, scooters, and mopeds – is crucial for selecting the perfect bike.
This guide will delve into the world of motorbikes, providing insights into their appeal, components, safety, and the journey to becoming a skilled rider.
Today is 12/22/2025 21:22:44 ()
What is a Motorbike?
A motorbike, also known as a motorcycle, is a two-wheeled motor vehicle. It’s fundamentally defined by its engine, providing the power to propel the vehicle forward, and its reliance on a rider for balance and steering.
Unlike cars, motorbikes offer an open-air riding experience, directly connecting the rider to the environment. They range significantly in size, power, and design, reflecting the diverse purposes they serve. From lightweight scooters for urban commuting to powerful sportbikes designed for speed and performance, the spectrum is broad.
Historically, motorbikes evolved from bicycles with added engines. Today, they incorporate advanced technologies like fuel injection, anti-lock braking systems (ABS), and sophisticated suspension systems. They are categorized into various types, including cruisers, standards, and adventure bikes, each tailored to specific riding styles and terrains.
Essentially, a motorbike is a dynamic machine offering both transportation and recreation, appealing to a wide range of riders seeking freedom and excitement.
The Appeal of Motorbikes
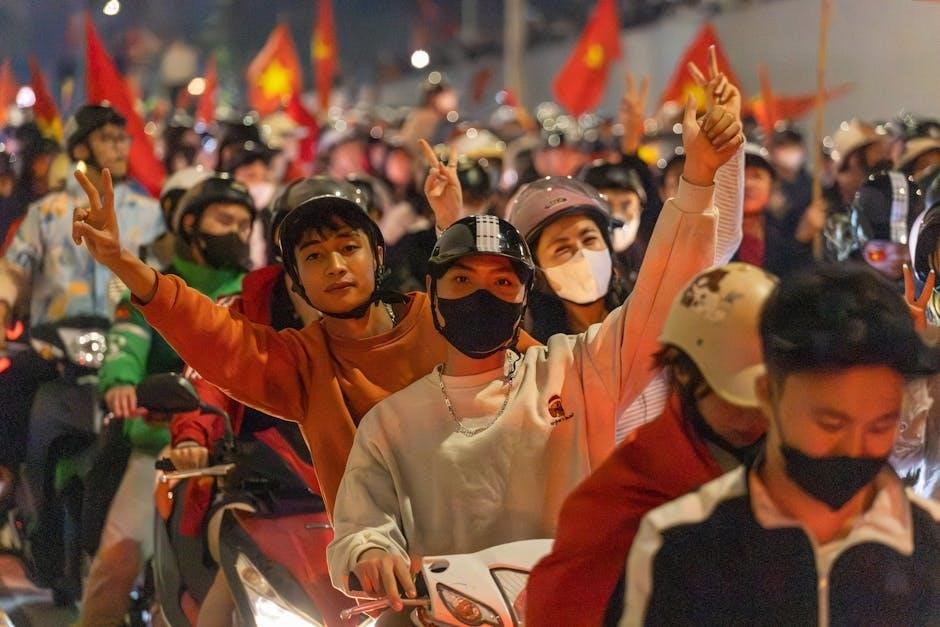
The allure of motorbikes extends far beyond simple transportation; it’s a lifestyle embraced by millions worldwide. A core attraction is the feeling of freedom and connection to the road, unmediated by a car’s enclosure. This direct experience heightens senses and provides a unique sense of liberation.
Motorbikes also offer a practical advantage in congested urban environments, easily navigating traffic and requiring less parking space. The relatively lower cost of purchase and maintenance, compared to cars, is another significant draw.
Beyond practicality, the social aspect is strong, with vibrant communities forming around shared riding experiences and a passion for motorcycle culture. Different types of bikes cater to diverse personalities, from the laid-back cruiser to the adrenaline-fueled sportbike, fostering a sense of belonging.
Ultimately, the appeal lies in the blend of practicality, excitement, and community, making motorbikes a compelling choice for many.

Types of Motorbikes: A Comprehensive Overview
Motorbikes come in diverse forms, each designed for specific purposes and rider preferences, ranging from nimble scooters to powerful adventure touring machines.
Today is 12/22/2025 21:22:44 ()
Standard/Naked Bikes
Standard, or naked bikes, represent a foundational motorcycle style, prioritizing versatility and a comfortable, upright riding position. These machines typically lack extensive fairings, exposing the engine and mechanical components – hence the “naked” moniker.
They are renowned for their balanced handling, making them excellent choices for both commuting and weekend rides. The exposed engine often delivers strong, usable power across the rev range, appealing to a wide range of riders.
Standard bikes often serve as a great entry point for newcomers due to their forgiving nature and manageable power delivery. They are also popular among experienced riders who appreciate their simplicity and direct connection to the machine. Expect a blend of practicality and enjoyable performance, making them adaptable to various riding scenarios.
Today is 12/22/2025 21:22:44 ()
Cruiser Bikes
Cruiser bikes embody a relaxed riding style, prioritizing comfort and a classic aesthetic. Characterized by low-slung seats, relaxed geometry, and often, a V-twin engine, cruisers are designed for long, leisurely rides. They evoke a sense of freedom and individuality, appealing to riders who value style and a laid-back experience.
These motorcycles often feature ample chrome detailing and a comfortable, feet-forward riding position. While not typically built for aggressive cornering, cruisers excel at straight-line stability and delivering a smooth, enjoyable ride on open highways.
Cruisers come in a variety of styles, from stripped-down bobbers to fully-equipped touring cruisers. They are a popular choice for riders seeking a comfortable and visually striking motorcycle for weekend adventures and cruising.
Today is 12/22/2025 21:22:44 ()
Sport Bikes
Sport bikes, also known as supersport motorcycles, are engineered for performance and agility. These machines prioritize speed, precise handling, and aerodynamic efficiency, making them ideal for track days and spirited riding on winding roads. They feature powerful engines, lightweight frames, and aggressive riding positions.
Sport bikes typically have a forward-leaning posture, requiring riders to actively engage their core and maintain a focused stance. Suspension systems are finely tuned for optimal control, and braking systems are exceptionally powerful, providing confident stopping power.
While offering exhilarating performance, sport bikes are generally less comfortable for long-distance touring. They represent the pinnacle of motorcycle engineering, catering to riders who demand the ultimate in handling and acceleration.
Today is 12/22/2025 21:22:44 ()
Dual-Sport & Adventure Bikes
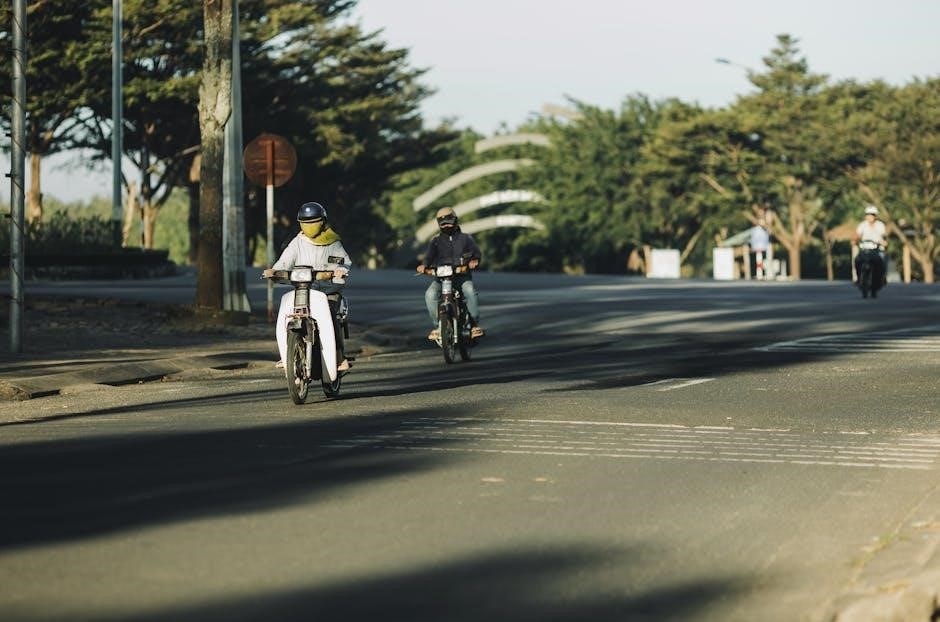
Dual-sport and adventure bikes represent versatility, bridging the gap between on-road comfort and off-road capability. These motorcycles are designed to handle a wide range of terrains, from paved roads to gravel paths and challenging trails. They offer a more upright riding position compared to sport bikes, enhancing comfort and control.
Adventure bikes, often larger in displacement and featuring more extensive suspension travel, are geared towards long-distance travel and exploration. Dual-sports are typically lighter and more agile, suitable for both commuting and weekend off-road adventures.
Both categories prioritize practicality and durability, making them popular choices for riders seeking freedom and the ability to explore beyond the confines of paved roads. They are a gateway to experiencing the world from a unique perspective.
Today is 12/22/2025 21:22:44 ()
Touring Bikes
Touring bikes are engineered for long-distance comfort and convenience, prioritizing rider and passenger well-being on extended journeys. These motorcycles feature large fairings for wind protection, spacious seating, and ample storage capacity, often including integrated luggage systems.
Comfort is paramount, with features like adjustable windscreens, heated grips, and cruise control enhancing the riding experience over many miles. Suspension systems are tuned for a smooth ride, even with a full load of luggage and a passenger.
Touring bikes are built for reliability and durability, capable of covering vast distances with minimal maintenance. They represent the ultimate in motorcycle travel, offering a luxurious and comfortable way to explore the world.
Today is 12/22/2025 21:22:44 ()
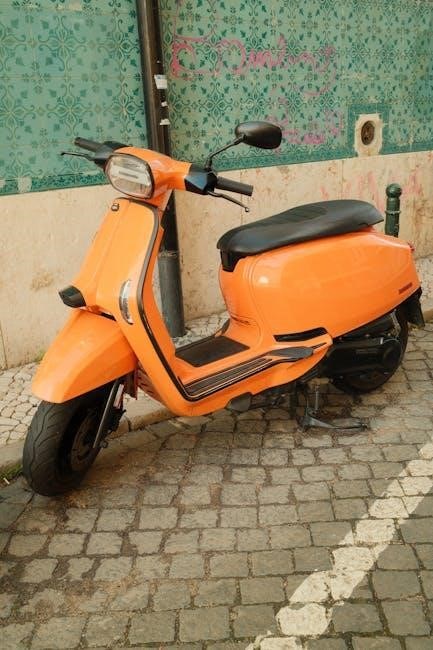
Scooters
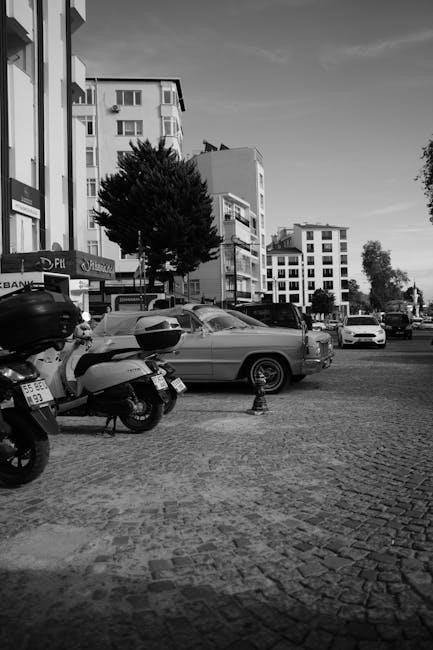
Scooters represent a practical and accessible entry point into the world of motorized two-wheeled vehicles, prioritizing ease of use and affordability. Characterized by their step-through frame and automatic transmissions, scooters are incredibly user-friendly, requiring minimal shifting or clutch operation.
They typically feature smaller engines, making them fuel-efficient and suitable for urban commuting. Storage space is often integrated, usually under the seat, providing convenient cargo capacity for daily errands. Scooters excel in navigating congested city streets due to their nimble handling and compact size.
Modern scooters increasingly incorporate advanced features like fuel injection, disc brakes, and even smartphone connectivity, enhancing both performance and convenience. They are a popular choice for riders seeking a simple, economical, and enjoyable transportation solution.
Today is 12/22/2025 21:22:44 ()
Mopeds
Mopeds, often confused with scooters, historically featured engines up to 50cc and were designed with pedals, allowing for both motorized and human-powered operation – hence the name, a portmanteau of “motor” and “pedal.” While many modern mopeds have dropped the pedals, the engine displacement remains a defining characteristic.
They generally have lower top speeds compared to scooters and motorcycles, making them suitable for short-distance travel on quieter roads. Regulations surrounding mopeds often differ from those governing motorcycles, sometimes requiring less stringent licensing or safety equipment.
Mopeds are known for their simplicity, affordability, and fuel efficiency, making them a practical option for basic transportation. They represent a cost-effective and accessible entry point into motorized vehicle ownership, particularly for younger or novice riders.
Today is 12/22/2025 21:22:44 ()
Essential Motorbike Components
Motorbikes rely on key systems: the engine providing power, the frame offering structure, suspension ensuring a smooth ride, and brakes guaranteeing safety.
Today is 12/22/2025 21:22:44 ()
The Engine
The engine is the heart of any motorbike, converting fuel into the power that drives the wheels. Most motorbikes utilize internal combustion engines, typically four-stroke engines, though two-stroke engines are still found in some smaller models.
Engine displacement, measured in cubic centimeters (cc), indicates the total volume of the cylinders and is a primary factor in determining power output. Smaller engines (under 500cc) are common in scooters and beginner bikes, while larger engines (over 1000cc) are found in high-performance sportbikes and touring machines.
Engine configurations vary, including inline, V-twin, and horizontally opposed (boxer) layouts, each offering unique characteristics in terms of power delivery, sound, and vibration. Modern engines often incorporate fuel injection for precise fuel metering and improved efficiency, replacing older carburetor systems. Understanding engine basics is crucial for appreciating a motorbike’s performance capabilities.
Today is 12/22/2025 21:22:44 ()
The Frame
The frame serves as the structural backbone of a motorbike, connecting all its components and providing rigidity. Different frame types influence handling, weight distribution, and overall bike characteristics.
Common frame materials include steel, aluminum, and increasingly, carbon fiber for high-performance machines. Steel frames are known for their strength and affordability, while aluminum frames offer a lighter weight. Tubular steel frames are a classic design, while perimeter frames, utilizing aluminum beams surrounding the engine, are prevalent in sportbikes.
The frame’s geometry – including rake, trail, and wheelbase – significantly impacts steering responsiveness and stability. A steeper rake angle generally results in quicker steering, while a longer wheelbase enhances stability. The frame must withstand significant stress from riding and impacts, ensuring rider safety and control.
Today is 12/22/2025 21:22:44 ()
Suspension System
The suspension system is critical for a comfortable ride and maintaining tire contact with the road. It absorbs bumps and vibrations, enhancing control and stability. Modern motorbikes typically employ telescopic forks at the front and a swingarm with a shock absorber at the rear.
Fork types include conventional, inverted (upside-down), and cartridge forks, each offering varying levels of performance and adjustability. Rear suspension systems range from basic coil-over shocks to sophisticated monoshocks with adjustable preload, compression, and rebound damping.
Proper suspension setup is vital; it impacts handling, braking, and rider confidence. Adjusting preload accommodates rider weight and luggage, while damping controls the rate of suspension movement. A well-tuned suspension system maximizes grip and minimizes fatigue during long rides.
Today is 12/22/2025 21:22:44 ()
Braking System
A motorbike’s braking system is paramount for safety, demanding respect and understanding. Most motorcycles utilize a combination of disc brakes and, less commonly, drum brakes. Disc brakes, employing calipers squeezing rotors, provide superior stopping power and heat dissipation.
Modern systems increasingly feature Anti-lock Braking Systems (ABS), preventing wheel lockup during hard braking, enhancing control, and reducing stopping distances. Linked braking systems distribute braking force between front and rear wheels, improving stability.
Regular brake pad inspection and replacement are crucial, as worn pads significantly reduce braking performance. Brake fluid should also be periodically flushed to maintain optimal hydraulic pressure. Mastering progressive braking technique – applying increasing pressure – is essential for safe and effective stopping.
Today is 12/22/2025 21:22:44 ()
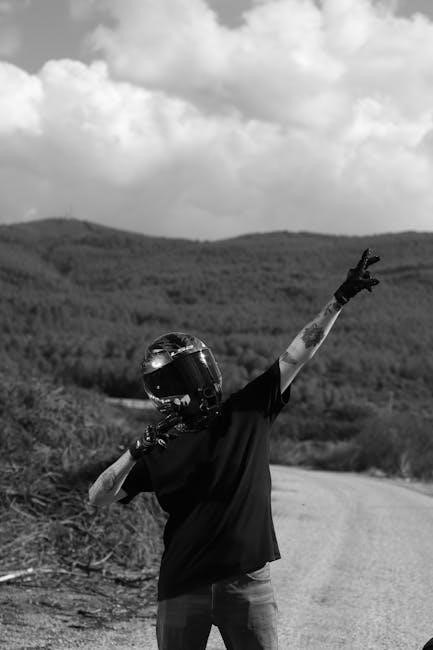
Motorbike Safety Gear
Prioritizing safety demands quality gear: helmets, jackets, gloves, and boots are non-negotiable, protecting riders from injury during accidents and harsh conditions.
Today is 12/22/2025 21:22:44 ()
Helmets
Helmets are the single most important piece of motorbike safety gear, providing crucial protection for the head in the event of an accident. Choosing the right helmet involves considering several factors, including fit, type, and safety certifications.
Full-face helmets offer the most comprehensive protection, covering the entire head and face, while open-face helmets provide less coverage but greater visibility and ventilation. Modular helmets combine features of both, allowing the chin bar to be lifted.
Look for helmets that meet or exceed safety standards set by organizations like DOT (Department of Transportation) and ECE (Economic Commission for Europe). A proper fit is essential; the helmet should be snug but not too tight, and it shouldn’t move around on your head. Regularly inspect your helmet for damage and replace it after any impact, or every five years, even if no accident has occurred.
Today is 12/22/2025 21:22:44 ()
Jackets and Protective Clothing
Jackets and protective clothing are vital for minimizing injuries during a motorbike ride, shielding against abrasion, impact, and the elements. Motorbike jackets are typically constructed from leather or textile materials, each offering distinct advantages.
Leather jackets provide superior abrasion resistance, while textile jackets often offer better weather protection and ventilation. Look for jackets with built-in armor at the shoulders, elbows, and back for enhanced impact protection.
Beyond the jacket, consider protective pants, gloves, and boots. Motorbike pants, often reinforced with abrasion-resistant materials, protect the legs. Gloves safeguard hands, and boots provide ankle support and foot protection. Investing in quality protective gear significantly reduces the risk of severe injuries in the event of a crash, enhancing overall riding safety.
Today is 12/22/2025 21:22:44 ()
Gloves
Motorbike gloves are an essential component of protective gear, safeguarding hands from abrasion, impact, and the elements during a ride. Hands are often the first point of contact in a fall, making robust gloves crucial for injury prevention.
Gloves are constructed from various materials, including leather, textile, and synthetic blends. Leather gloves offer excellent abrasion resistance and a secure grip, while textile gloves provide enhanced comfort and breathability. Look for gloves with reinforced palms, knuckle protection, and wrist closures for optimal safety.
Consider the climate and riding style when selecting gloves. Warmer gloves are ideal for colder weather, while ventilated gloves are better suited for hot conditions. Proper fitting is also vital, ensuring a secure grip and dexterity while operating the motorbike’s controls.
Today is 12/22/2025 21:22:44 ()
Boots
Motorbike boots are a critical piece of safety equipment, providing essential protection for ankles, feet, and lower legs during a ride or potential accident. Unlike regular footwear, motorbike boots are specifically designed to withstand the rigors of motorcycling, offering superior impact resistance and abrasion protection.
Look for boots with reinforced ankle support, toe boxes, and heel cups. Many boots also feature shin protection and oil-resistant soles for enhanced grip. Materials commonly used include leather and synthetic compounds, each offering varying levels of durability and comfort.
Consider the type of riding you’ll be doing when choosing boots. Touring boots offer maximum comfort for long distances, while sportbike boots prioritize protection and flexibility; Proper fit is paramount, ensuring a secure and comfortable feel while operating the bike’s controls.
Today is 12/22/2025 21:22:44 ()
Getting Started: Licensing and Training
Obtaining a motorbike license and completing a rider training course are vital first steps, ensuring legal operation and developing essential skills for safe riding practices.
Today is 12/22/2025 21:22:44 ()
Motorbike Licenses
Securing a motorbike license varies significantly by location, typically involving a tiered system based on engine displacement and rider experience. Most jurisdictions require a written knowledge test covering traffic laws and safe riding practices, followed by a practical skills test demonstrating control and hazard awareness.
Beginners often start with a learner’s permit, allowing supervised riding before progressing to a full license. This permit usually necessitates completing a certified rider training course. License classifications often differentiate between standard motorcycles and those with larger engines or specialized features.
Reciprocity agreements exist between some states or countries, enabling license recognition for temporary riders. It’s crucial to research specific requirements in your area, as regulations regarding age, vision, and required documentation can differ. Proper licensing is not just a legal obligation, but a demonstration of commitment to responsible riding and road safety.
Today is 12/22/2025 21:22:44 ()
Rider Training Courses
Rider training courses are invaluable for both novice and experienced motorcyclists, offering a structured learning environment to enhance skills and promote safe riding habits. These courses, often offered by state-approved organizations, typically combine classroom instruction with practical on-bike exercises.
Basic courses cover fundamental controls, clutch operation, braking techniques, and hazard avoidance maneuvers. Advanced courses delve into cornering, emergency braking, and defensive riding strategies. Completion of a certified course often waives the practical skills test for licensing, and can also qualify riders for insurance discounts.
Experienced riders benefit from refresher courses to update skills and address evolving traffic conditions. Choosing a course with certified instructors and a well-maintained practice range is essential for maximizing learning and building confidence. Investing in rider training is a proactive step towards responsible motorcycling.
Today is 12/22/2025 21:22:44 ()
Maintaining Your Motorbike

Regular motorbike maintenance ensures optimal performance, safety, and longevity; diligent checks, oil changes, and chain care are absolutely essential for every rider.
Today is 12/22/2025 21:22:44 ()
Regular Checks
Consistent pre-ride inspections are paramount for motorbike safety and reliability. Before each journey, meticulously examine your tires for proper inflation, tread depth, and any signs of damage like cuts or bulges. Fluid levels – oil, coolant, brake fluid – must be checked and topped off as needed, ensuring optimal engine and braking performance.
Inspect lights (headlight, taillight, turn signals) to confirm they are functioning correctly, enhancing visibility and signaling intentions. Verify the brake levers and pedals offer firm resistance, indicating proper brake operation. A quick check of the chain (if applicable) for appropriate tension and lubrication is also vital. Don’t forget to examine the throttle for smooth operation and return.
Finally, a visual scan for any loose parts, leaks, or unusual wear can prevent minor issues from escalating into major problems. These routine checks, though seemingly small, contribute significantly to a safer and more enjoyable riding experience.
Today is 12/22/2025 21:22:44 ()
Oil Changes
Regular oil changes are the lifeblood of a healthy motorbike engine, crucial for reducing friction, dissipating heat, and removing debris. The frequency depends on your bike’s model, riding style, and the type of oil used – consult your owner’s manual for specific recommendations. Typically, changes are needed every 3,000 to 6,000 miles, or annually, whichever comes first.
The process involves draining the old oil, replacing the oil filter, and refilling with the correct grade and quantity of fresh oil. Using the recommended oil type is vital; synthetic oils generally offer superior protection and longer intervals. Always dispose of used oil responsibly at a designated recycling center.
Monitoring oil levels between changes is also important. Low oil can cause severe engine damage. Consistent oil changes significantly extend your motorbike’s lifespan and maintain optimal performance.
Today is 12/22/2025 21:22:44 ()
Chain Maintenance
Proper chain maintenance is essential for smooth power delivery and longevity on chain-driven motorbikes. A neglected chain can lead to decreased performance, increased wear, and even catastrophic failure. Regular cleaning and lubrication are key; dirt and grime accelerate wear. Use a dedicated chain cleaner and brush to remove debris, then apply a chain-specific lubricant;
Checking chain slack is crucial. Too tight, and it strains the drivetrain; too loose, and it can derail. Consult your owner’s manual for the correct slack specification. Adjust as needed using the chain adjusters. Regularly inspect the chain for kinks, rust, or damaged links – replace if necessary.
Consistent attention to your chain ensures a safe and enjoyable riding experience, preventing costly repairs and maximizing your motorbike’s efficiency.
Today is 12/22/2025 21:22:44 ()